Hi,
In this example we are going to show how to access bean instances from other bean instances using task flows.
Based on a question in the OTN forum:
https://forums.oracle.com/forums/thread.jspa?threadID=2321268&tstart=0
It might sound a bit strange to some, but task flows can be quite helpful for that matter.
Download Sample Application.
What is the purpose of task flows?
According to documentation:
http://docs.oracle.com/cd/E24382_01/web.1112/e16182/taskflows.htm#BABFBAFA
ADF task flows provide a modular approach for defining control flow in a Fusion web application.
Among other things, Task Flows provide the ability to instantiate beans with the appropriate scope.
According to documentation:
http://docs.oracle.com/cd/E24382_01/web.1112/e16182/web_getstarted.htm#CACCFIII
In an application that uses ADF data binding and ADF task flows, managed beans are registered in different configuration files from those used for a standard JSF application. In a standard JSF application, managed beans are registered in the
So, basically, this means that, we can declare managed beans with a specific scope per taskFlow.
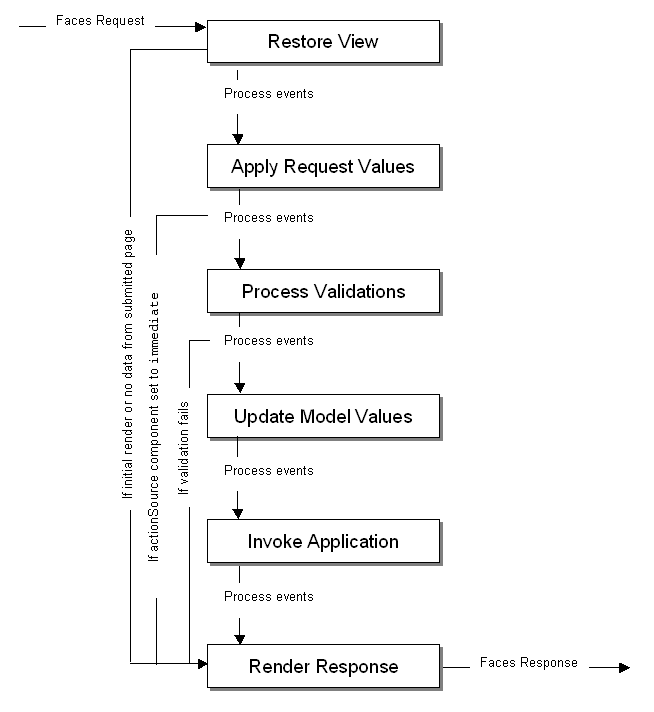
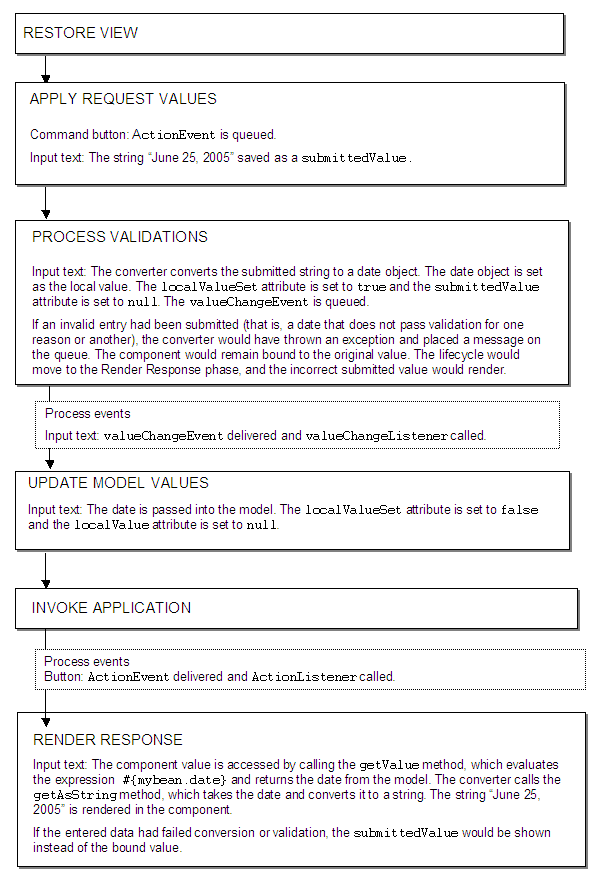
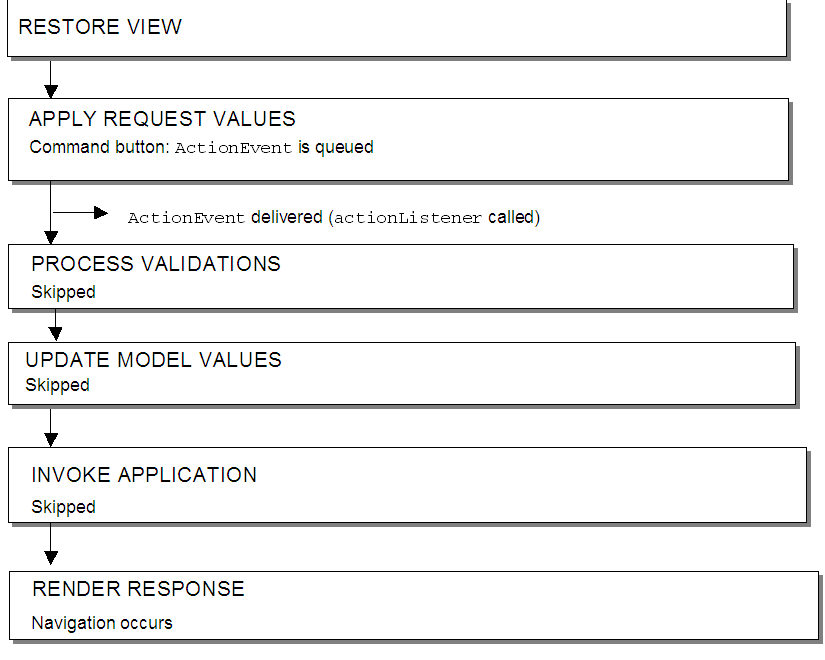
If you check the documentation's images regarding task flows and managed beans:
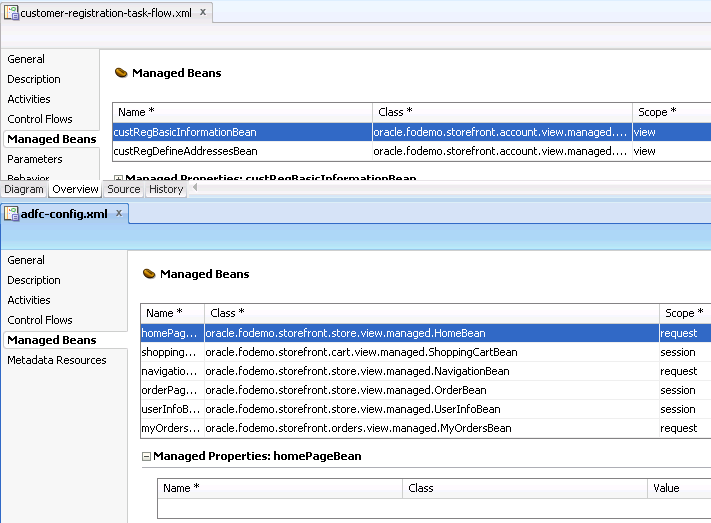
You will notice that each managed Bean has it's own properties.
This gives us the ability to create, as declarative as possible, connections between instances of beans.
This of course needs an understanding of the bean scopes in order to have a proper implementation.
Here is the documentation about scopes
http://docs.oracle.com/cd/E15523_01/web.1111/b31974/taskflows.htm#CHDFAIGC
http://docs.oracle.com/cd/E24382_01/web.1112/e16182/adf_lifecycle.htm
For persistent readers and investigators on bean scopes. Please refer to a very interesting discussion on EMG
http://groups.google.com/group/adf-methodology/browse_thread/thread/c7427b4b0b69766d
Lets move on to our scenario:
For the sake of this example, we are going to create a page template. Inside this page template we are going to place a menuBar with some menus and menuItems.

Then we are going to bind some of the menus to a backing bean. of scope View. Why we want to have it in a View Scope? Well, this is going to be another detailed post about scopes. For now, lets say that we want to keep the binding alive during the life of the page (ViewPort)
We are going to create a new Java Class and we are going to name her ( I prefer to thing of it as a she :) )
TemplateBean. Then we are going to create bindings to some of the menus:
templateBean

template page:

At this point, if we check our adfc-config.xml file we will see that the appropriate entry of the bean is written:

Next, we are going to create a taskflow and a page inside it. That page is going to use the previously mentioned template.

Creating the page based on the previously created template:

We are going to use the HR Schema for this example and the Employees table. We will generate the appropriate BC with the wizard of JDeveloper:

Up to now, we have completed the following:
1) Generated the Business Components.
2) Created a page template with some menus and menu items and binded some menus with a backing bean with scope of type View.
3) Created a task flow and a page in it that is using this template.
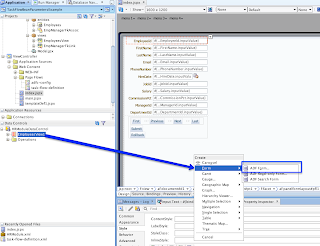
In the new page we are going to drag and drop the employees iterator to the page as a form:
There is an additional button with the rollback operation as you will see in the above picture.
This is added during the making of the sample application.
For this example application, we are going to have the following logic:
When the user changes the salary of an employee, menu1 will be disabled if the new value is greater than 100. if the value is lower or equal to 100.
NOTE: For the simplicity of this example we are going to have the menus enabled during query. The above scenario will take place only when changing values. This might not seem a real case scenario but the goal is to demonstrate the features of taks flows and their injection of bean instances to other instances.
Now, lets think about our case a bit... We have a template with some menus.. This template.. well is a template.. and for that reason it can be used in many cases and pages.. So it is not wise to bind it with a specific use case right? We have to keep the template menus loose and adaptive to any page..
We already have bindings to a backing bean of those menus... Why not use them then?
We are going to create a value change listener method for the salary attribute of our page:

With the help of the wizard, we crated a managed bean with the Value Change Listener method for the salary attribute.
If we check the task flow properties now, we will see that there is a new entry there:

According to our scenario, we want to check the value of the salary attribute and disable the menu1 which resides in the template we created previously.
And here comes the magic.. All we have to do is to create a property in the bean of the page with the same type as the template bean, implement our logic and make the appropriate reference in the task flow...

Lets implement our Value Change Listener logic:

The only thing left now, is to reference to the appropriate TemplateBean instance.
This can be easily done in our task flow:

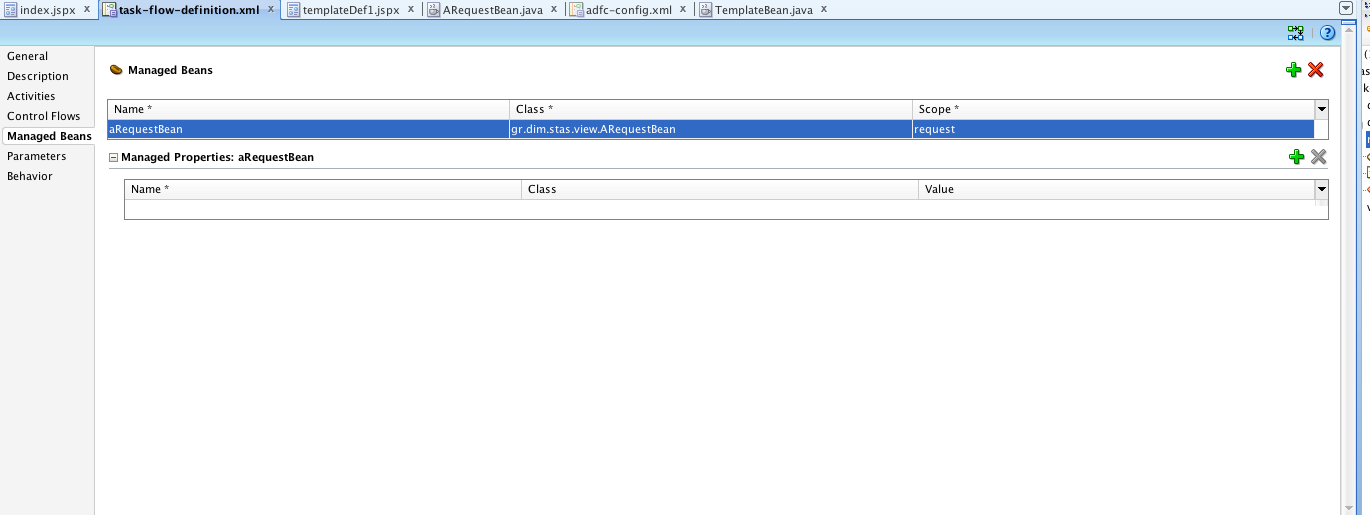
As you can see from the above picture, we create another managed Bean in our task flow. The one for the templateBean.
Then, after selecting the aRequestBean, we created a new property and placed the correct name of the property, class and the instance we want to use.
Everything else will be handled by the framework.
It doesnt get more declarative than this!
And that is it!
Download Sample Application.
Regards.
In this example we are going to show how to access bean instances from other bean instances using task flows.
Based on a question in the OTN forum:
https://forums.oracle.com/forums/thread.jspa?threadID=2321268&tstart=0
It might sound a bit strange to some, but task flows can be quite helpful for that matter.
Download Sample Application.
What is the purpose of task flows?
According to documentation:
http://docs.oracle.com/cd/E24382_01/web.1112/e16182/taskflows.htm#BABFBAFA
ADF task flows provide a modular approach for defining control flow in a Fusion web application.
Among other things, Task Flows provide the ability to instantiate beans with the appropriate scope.
According to documentation:
http://docs.oracle.com/cd/E24382_01/web.1112/e16182/web_getstarted.htm#CACCFIII
In an application that uses ADF data binding and ADF task flows, managed beans are registered in different configuration files from those used for a standard JSF application. In a standard JSF application, managed beans are registered in the
faces-config.xml configuration file. In a Fusion web application, managed beans can be registered in the faces-config.xml file, the adfc-config.xml file, or a task flow definition file. Which configuration file you use to register a managed bean depends on what will need to access that bean, whether or not it needs to be customized at runtime, what the bean's scope is, and in what order all the beans in the application need to be instantiated.So, basically, this means that, we can declare managed beans with a specific scope per taskFlow.
If you check the documentation's images regarding task flows and managed beans:
You will notice that each managed Bean has it's own properties.
This gives us the ability to create, as declarative as possible, connections between instances of beans.
This of course needs an understanding of the bean scopes in order to have a proper implementation.
Here is the documentation about scopes
http://docs.oracle.com/cd/E15523_01/web.1111/b31974/taskflows.htm#CHDFAIGC
http://docs.oracle.com/cd/E24382_01/web.1112/e16182/adf_lifecycle.htm
For persistent readers and investigators on bean scopes. Please refer to a very interesting discussion on EMG
http://groups.google.com/group/adf-methodology/browse_thread/thread/c7427b4b0b69766d
Lets move on to our scenario:
For the sake of this example, we are going to create a page template. Inside this page template we are going to place a menuBar with some menus and menuItems.

Then we are going to bind some of the menus to a backing bean. of scope View. Why we want to have it in a View Scope? Well, this is going to be another detailed post about scopes. For now, lets say that we want to keep the binding alive during the life of the page (ViewPort)
We are going to create a new Java Class and we are going to name her ( I prefer to thing of it as a she :) )
TemplateBean. Then we are going to create bindings to some of the menus:
templateBean

template page:

At this point, if we check our adfc-config.xml file we will see that the appropriate entry of the bean is written:

Next, we are going to create a taskflow and a page inside it. That page is going to use the previously mentioned template.

Creating the page based on the previously created template:

We are going to use the HR Schema for this example and the Employees table. We will generate the appropriate BC with the wizard of JDeveloper:

Up to now, we have completed the following:
1) Generated the Business Components.
2) Created a page template with some menus and menu items and binded some menus with a backing bean with scope of type View.
3) Created a task flow and a page in it that is using this template.
In the new page we are going to drag and drop the employees iterator to the page as a form:

There is an additional button with the rollback operation as you will see in the above picture.
This is added during the making of the sample application.
For this example application, we are going to have the following logic:
When the user changes the salary of an employee, menu1 will be disabled if the new value is greater than 100. if the value is lower or equal to 100.
NOTE: For the simplicity of this example we are going to have the menus enabled during query. The above scenario will take place only when changing values. This might not seem a real case scenario but the goal is to demonstrate the features of taks flows and their injection of bean instances to other instances.
Now, lets think about our case a bit... We have a template with some menus.. This template.. well is a template.. and for that reason it can be used in many cases and pages.. So it is not wise to bind it with a specific use case right? We have to keep the template menus loose and adaptive to any page..
We already have bindings to a backing bean of those menus... Why not use them then?
We are going to create a value change listener method for the salary attribute of our page:

With the help of the wizard, we crated a managed bean with the Value Change Listener method for the salary attribute.
If we check the task flow properties now, we will see that there is a new entry there:
According to our scenario, we want to check the value of the salary attribute and disable the menu1 which resides in the template we created previously.
And here comes the magic.. All we have to do is to create a property in the bean of the page with the same type as the template bean, implement our logic and make the appropriate reference in the task flow...

Lets implement our Value Change Listener logic:

The only thing left now, is to reference to the appropriate TemplateBean instance.
This can be easily done in our task flow:

As you can see from the above picture, we create another managed Bean in our task flow. The one for the templateBean.
Then, after selecting the aRequestBean, we created a new property and placed the correct name of the property, class and the instance we want to use.
Everything else will be handled by the framework.
It doesnt get more declarative than this!
And that is it!
Download Sample Application.
Regards.