Hi,
This is an example demonstrating the usage of selectOneRadio component.
Download Sample Application.
User Requirement:
We want to be able to change the manager of a department by selecting one of the already existing Employees in a form of radio Buttons. This will enable us the functionality to always see every information we want and select accordingly.
Model: We are going to use the HR schema.
We are going to generate the following tables
Thoughts:
How are we going to create the radio buttons?? All we have is a master detail relationship between Departments and Employees.

Our BC generation with the help of the JDev wizard. As you will see below, all unneeded stuff for this case are removed.
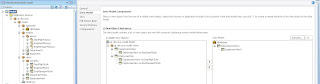
Basically we want to change the managerId of the Departments table.. (how about an LOv?)
I know! We can use the selectOneRadio UI Component! (Do not hold your breath just yet... we are still thinking here! :F )
Each Employee will be represented as a selectOneRadio! (How about an LOV?)
Great.
This means that we are going to create our af:table with our Departments:


OK, we now have our own departments table. All we have to do is to drop the Employees in the new Column:

From the attributes wizard we can expand the choice list and select multiple items:


By now, according to plan (Still, do not hold your breath just yet... we are just following one thought.. Unfortunately these thoughts are the ones that come in mind first...... so lets see where this leads us...)
And how are we going to actually set the new value of the selected Employee as a the new managerId?
UUh.. we are going to override the setter of... uuh.. I do know just yet.. I have to thing about it.
OK..
Lets see the out of the box behavior of our application.. Lets just run the application.
The that we developed here is the following:
As you will see, we have the same employees for every Department!!!

After we change the row of the Departments, all of the sudden, we new Employees!!!
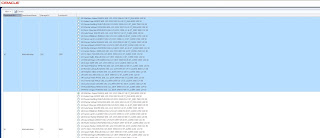
Obviously, this is not that good.....
Why is this happening? It should not be happening.... should not it?
Well, it should and it does so..
The detail here (Employees) is refreshed after the change of the current row of the Master (Departments). That is why we see the radiogroup change after we select a new row.
We make the new row current. The framework queries (or gets the appropriate collection) the detail.
This is the out of the box functionality.
Can we make it work? Yes, we have to make several changes in order to make this working..
But is it not already complicated as it is?????
Are we really considering in continuing towards this approach? This approach already produced many issues to think of . Not to mention that we have not yet figured out how are we going to update the managerId of the Department..
At this point, we have a very clear indication that the above approach is not the appropriate one.
Re-thinking:
Ok. lets start over..
What do we exactly want?
We want to be able to "appoint" an employee as a manager for a specific Department.
We want to do that, by selecting the appropariate Radio Button.
Furthermore, as the user or someone else would say:
" I would like to be able to see a table with all the departments and inside each Department, I would like to see a list of all employees and be able to see which of them is the manager and be able to choose and change the Manager"
Ok... I know, it might not be that detailed in many cases.... but lets follow it..
As we saw earlier, the first approach, the one that came to mind was not that easy to implement. for that reason we dropped it and we will Re-think everything in order to find a better solution.
How about LOVs???
We could create an LOV in the managerId attribute of the DepartmentsView...
This LOV will represent only the Employees of the specific Department.
What do we gain by this??


Click ok.
We have now created our List Of Values and set its type to Radio Group. I was not that easy was not it?
Next Question:
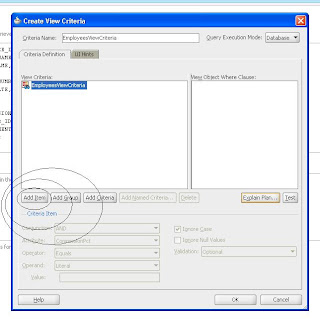
this is quite Simple, we will create a view Criteria to EmployeesView. Just follow the screens below:
Locate the EmployeesVie



Next Question:

If you select the accessor and click on the pencil button you will see that we can have access to the View Criteria!

In order to always apply the View Criteria we have created. we will have to shuttle it on the right. with this way the View Criteria will be on the Selected side. Below you see that we also have access to the Bind Variables of that View Criteria. The value column is empty. In Order to set the proper value, we have to provide the name of the Department Id attribute of the DepartmentView, which is "DepartmentId". We verify this by checking the Attributes of the DepartmentsView.

Next Question:

After fixing a bit the layout. Once we run the page we will see the following:

One Last Question:
NOTE: This is a purely illustrative example of the benefits of using List Of Values. This is not a real example and for that reason it might not fit your needs in terms of data.
Download Sample Application.
Regards.
This is an example demonstrating the usage of selectOneRadio component.
Download Sample Application.
User Requirement:
We want to be able to change the manager of a department by selecting one of the already existing Employees in a form of radio Buttons. This will enable us the functionality to always see every information we want and select accordingly.
Model: We are going to use the HR schema.
We are going to generate the following tables
- Department
- Employees
Thoughts:
How are we going to create the radio buttons?? All we have is a master detail relationship between Departments and Employees.

Our BC generation with the help of the JDev wizard. As you will see below, all unneeded stuff for this case are removed.

NOTE: in this post, we are going to follow another approach of explaining things...
We are going to follow the first thing that it might come in mind. Then we are going to think it over and see the simplicity of things. This is an experimental way of approaching a matter and covers the case where things are not that clear in our mind regarding the best approach to follow. Sometimes I find people accepting solutions "as is" without considering to challenge them. With this approach, we are going to rethink some approaches in order to determine which is the simplest and best
I know! We can use the selectOneRadio UI Component! (Do not hold your breath just yet... we are still thinking here! :F )
Each Employee will be represented as a selectOneRadio! (How about an LOV?)
Great.
This means that we are going to create our af:table with our Departments:

select Single Row::

Then, create another column inside that table:

OK, we now have our own departments table. All we have to do is to drop the Employees in the new Column:

From the attributes wizard we can expand the choice list and select multiple items:


By now, according to plan (Still, do not hold your breath just yet... we are just following one thought.. Unfortunately these thoughts are the ones that come in mind first...... so lets see where this leads us...)
And how are we going to actually set the new value of the selected Employee as a the new managerId?
UUh.. we are going to override the setter of... uuh.. I do know just yet.. I have to thing about it.
OK..
Lets see the out of the box behavior of our application.. Lets just run the application.
The that we developed here is the following:
As you will see, we have the same employees for every Department!!!

After we change the row of the Departments, all of the sudden, we new Employees!!!
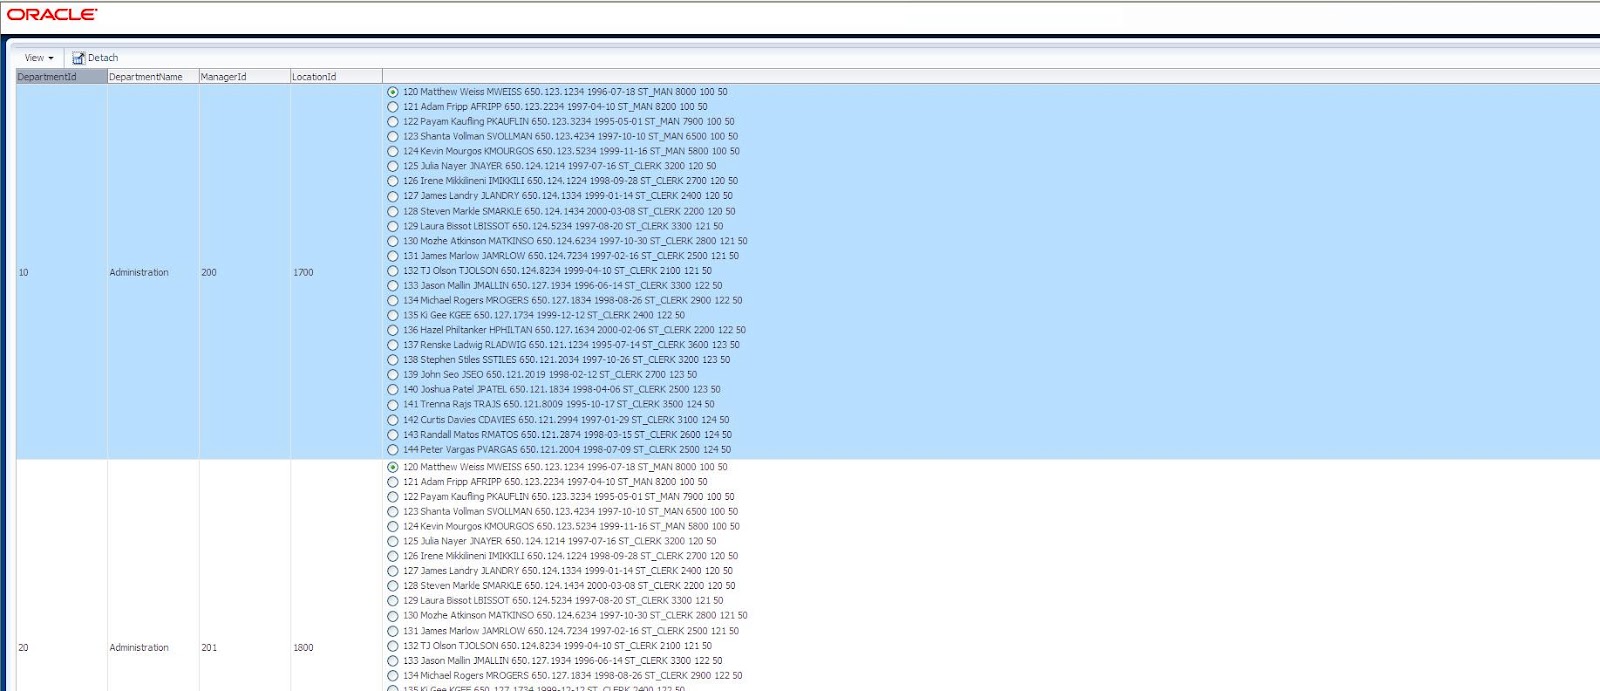
Obviously, this is not that good.....
Why is this happening? It should not be happening.... should not it?
Well, it should and it does so..
The detail here (Employees) is refreshed after the change of the current row of the Master (Departments). That is why we see the radiogroup change after we select a new row.
We make the new row current. The framework queries (or gets the appropriate collection) the detail.
This is the out of the box functionality.
Can we make it work? Yes, we have to make several changes in order to make this working..
But is it not already complicated as it is?????
Are we really considering in continuing towards this approach? This approach already produced many issues to think of . Not to mention that we have not yet figured out how are we going to update the managerId of the Department..
At this point, we have a very clear indication that the above approach is not the appropriate one.
Re-thinking:
Ok. lets start over..
What do we exactly want?
We want to be able to "appoint" an employee as a manager for a specific Department.
We want to do that, by selecting the appropariate Radio Button.
Furthermore, as the user or someone else would say:
" I would like to be able to see a table with all the departments and inside each Department, I would like to see a list of all employees and be able to see which of them is the manager and be able to choose and change the Manager"
Ok... I know, it might not be that detailed in many cases.... but lets follow it..
As we saw earlier, the first approach, the one that came to mind was not that easy to implement. for that reason we dropped it and we will Re-think everything in order to find a better solution.
How about LOVs???
We could create an LOV in the managerId attribute of the DepartmentsView...
This LOV will represent only the Employees of the specific Department.
What do we gain by this??
- The Framework handles the setting and the getting of the managerId.
- we ensure that the appropriate employees will be shown in the list of employees.
- We ensure that all employees will be grouped together and will be treated as a group. This means that only one will be always selected.
How are going to do the following?
- How are we going to create the LOV?
That is easy. We will locate the managerId Attribute in the DepartmentView and then we will create the LOV. Just follow the screens below:
locate the attribute:

Add the new accessor:

Select the corresponding Attribute:

go the UI Hints tab and select the type of the LOV to Radio Group

Then select the attributes you want to be visible in each row of the List Of Values:

Click ok.
We have now created our List Of Values and set its type to Radio Group. I was not that easy was not it?
Next Question:
- How are we going to filter the Data to the corresponding Department?
this is quite Simple, we will create a view Criteria to EmployeesView. Just follow the screens below:
Locate the EmployeesVie

in the Create View Criteria Wizard, add an Item:

locate the managerId and select it. Then select Bind Variable and press the green sign.
In the new window, change the name of the bind Variable and change also the type to Number. Since we are creating a Bind Variable to bind an Attribute it must have the same type. Click ok in both dialogs.

and there you go. the View Criteria is created:

- How are we going to set the appropriate DepartmentId value for every department??
That is even more easy.. All we have to do is to "enable" the View Criteria we have created.
After the creation of the LOV in the DepartmentsView, a ViewAccessor was created in that DepartmentsView:

If you select the accessor and click on the pencil button you will see that we can have access to the View Criteria!

In order to always apply the View Criteria we have created. we will have to shuttle it on the right. with this way the View Criteria will be on the Selected side. Below you see that we also have access to the Bind Variables of that View Criteria. The value column is empty. In Order to set the proper value, we have to provide the name of the Department Id attribute of the DepartmentView, which is "DepartmentId". We verify this by checking the Attributes of the DepartmentsView.

Next Question:
- How are we going to represent this properly.
That is even more easy!! We will simply drag and drop the DepartmentsView onto the page and select af:table.
As you can see below, while drag and drop as shown in our previous thought the managerId is already set as a Select OneGroup:

After fixing a bit the layout. Once we run the page we will see the following:

One Last Question:
- Do we need the hierarchy represented in the Application Module?
Nope.. we dont. all we need is the DepartmentsView shuttled in the Application Module. Since we will be using the LOV, we do not need to have additional View Objects in our Application Module. So, we can remove the EmployeesView from our Application Module and keep only the DepartmentsView.
NOTE: This is a purely illustrative example of the benefits of using List Of Values. This is not a real example and for that reason it might not fit your needs in terms of data.
Download Sample Application.
Regards.


