Monday, October 24, 2011

PopUp and Esc/Cancel operations. ADF 11g

Hi,

When we create a popup with a dialog inside it. The dialogListener cannot actually capture the Esc or the cancel button. For this case, we are using the popupCancelListener of the popup.

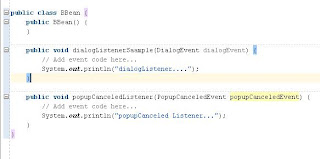
This small application has only one button and a popup with a dialog inside. All the default actions with declarative programming.

Download sample application.

Regards.

Thursday, October 20, 2011

Master Detail Data presentation and CRUD Operations. Detail records in an Editable Popup. ADF 11g

Hi,

This yet another example of Master Detail data representation.
The difference here is that, the Detail rowsets will be presented in a popup.
We are going to use HR schema of Oracle XE for this example.

Download Sample Application.

We are going to use Departments as the Master and Employees as the Details.
Departments will be presented in an table.
The Departments table will have all CRUD operations. Insert, Update, Delete. Additionally there will be a Rollback button.
Every Record in the Departments table will have an additional column where an edit button will reside.
The edit button, when pressed, will show a popup which will present another table, the table of the Employees that work to this Department.

Using the Generate Business Components From Tables wizard of JDeveloper, we produce all the necessary entities, associations, view objects and viewlinks. It is a very straightforward process.


After having the BC created along with the Application Module, we proceed in creating the View controller components.
We will create a bounded task flow and within it, we will create our index jspx.

Inside the Jspx we will drag and drop the Departments iterator and we will choose to select a single row from the Row Selection.


 and select the single selection


After creating the table, we will surround it with a panelCollection  component. This container will hold the toolbar of the CRUD buttons for this table. Additionally, both in the panelCollectin and table, we set the AFStretchWidth   in the styleClass. It is recomended by Oracle in order to have properl full width layout.

The we drop a toolbar in the panelCollections toolbar facet and then we drop the Department's operation from the DataControl.

We will add, createInsert, delete, commit and rollback. Commit and Rollback operations are for the whole datacontrol and not only for the Departments table.


Next, we have to create a popup. This popup will show the employees of the corresponding Department.
Inside the popup we will add a Dialog. Inside this Dialog we will drag and Drop the Employees iterator and have exactly the same process as we did with Departments.


Eventually, we will have a similar table with Departments.


Popup component by default caches the first data that will be shown. In our case, we do not want that since we want a refreshed view of the employees. This means that we want to execute Query for employees for every Department.
So we have to set lazyUncached the contentDelivery property.


NOTE: Since we are using toolbars and toolbar buttons we have to  set the appropriate partial triggers. Toolbar buttons by default have the partialSubmit  property to  true. This means that we have to set the appropriate partialTriggers  to the tables.
Each table will be partially triggered by it's toolbar buttons. So in Every table, in the partialTriggers sections we will add the correspoing toolbar button ids.


After setting the appropriate partialTriggers, the only thing left is, the edit button.

We right click on the table and select insert Column.
Then, we right click on the column and insert ADF faces button.
After that, we right click on the button and insert ADF showPopupBehavior.
In the showPopupBehavior we enter the popupId and the type of action:


And that is it.
When pressing Employees button, ADF will invoke additionally the selectionListener and make the departments current row. So every time we press the edit button, the current Department becomes current and the corresponding employees are fetched.

Download Sample Application.

Regards.

Wednesday, October 19, 2011

Entity Attribute Validation Rule (Business Rule) based on Master View Object Attribute Example ADF 11g

Hi,
Here is an example case of entity attribute validation rule.

Download Sample Application.

This example is using HR Schema of Oracle XE.
The following case uses Employees and Departments Entities and View Objects.
All Business components are created through JDeveloper 11g wizard.
The validation will check if the ManagerId attribute of the Employees Entity has the same value as the ManagerId of the Department.
We consider that there should not be the same Manager of a Department and an Employee.
Just to clarify that this is an example and maybe the logic does not seem very logical....
The point is to present the solution.
So, what do we have so far?
Two Entities (Employees and Departments) with their association (Master is the Departments entity)
Two View Objects( Employees and Departments) with their corresponding entities and the appropriate view Link.

Now, as we said earlier, we want to prevent the user from setting managerId value, for an Employee, which is the same as the managerId value for the corresponding Department.

In order to implement this case the declarative way, we are going to create an Entity Attribute Validation Rule  or in other words, Entity Attribute Business Rule.

We locate the Employees entity and the ManagerId attribute and press the green plus sign:


A new wizard window  will appear that will guide us to create the validation we want.
For this scenario, we want to compare the Employees Entity managerId with the Departments View Object  managerId. For that reason, we will select the value View Object Attribute  value of the Compare With  choice list. Further more we set the Operator  to  Not Equals.

Location of te ManagerId

Setting the  Not Equals


The final thing to do is to set an appropriate message that will notify the user that this value cannot be accepted.

This Rule Definition will be triggered  when the Employees managerId attribute is the same as the Departments View Object managerId attribute.


In order to test the example, we do not need to  create any jspx.. Since this is a BC validation, all we have to do is run the Application Module:

In the following example: Department has ManagerId of nbr: 200

 We double click on the Employees view and change the managerId to 200 and press tab. The result will be the following: (the message is just for fun.. .not an actuall logic message.. or is it? :) )


And that is it..
Dont you just feel  a little bit more Declarative now?

Download Sample Application.


Regards.

Monday, October 17, 2011

Master Detail on separate Pages and Separate Task Flows ADF 11g

Hi,

This is another small example of how to present Master-Detail information. This example will show to present master detail data over different pages where each page exists in a different task Flow.
Furthermore, you can find a discussion in the forum, where this post was inspired from.

Download The Sample Application.

The implementation is almost the same as a previous post:

http://dstas.blogspot.com/2011/10/master-detail-on-separate-pages-jspx.html

The difference here is that, Master Detail pages exist in different task Flows.
This approach has the following differences:

Create another task flow for the details page.

In the master task flow, make a call to another task flow (the details task flow that is..) instead of a page.


In the details task flow, make a call to a task flow return instead of the master page. The task flow return will return to the calling task flow.


And here is the "tricky" part of the implementation. In order to keep the task flows synchronised with each other in terms of Data Control, we have to share the same Data Control.
This can be easily done by selecting a check box in the detail task flow that will do just that. It will "get" the Data Control of the calling task Flow.


So, every time the master task flow will call the detail task flow, it will delegate the Data Controls. This means that there will be a consistency between Master and Detail task flows in terms of data.

Download The Sample Application.

Regards.

Friday, October 14, 2011

Master Detail on Separate Pages jspx ADF 11g

Hi,

This is an example of using a typical master detail relationship but in different pages.
The master will be in one page and the details will be in another page.
The use case is simple.
Select a master row from a table and then navigate to the details table of this master which are in another page.
For this case we will use the Department and the Employees tables of the HR Schema.
The Departmens will be the master page and the Employees will be the details page.

Download The Sample Application.

For starters.  We have to create the appropriate ViewLinks between DepartmentView and employeesView.

The "trick" here is to use the appropriate iterators in the same DataControl.

This means that, in our case, we will have a task flow with two view inside that will share the same data control.


So, in the first page, we will drag and drop departments iterator as a table. Add a button for the navigation.

For the second page, we will drag and drop employees iterator, the one that resides inside the Departments tree.


And that it is.. The framework will take care of the rest. The Binding layer will keep the relationship open between the two iterators since they are sharing the same dataControl.

Download the sample Application

Regards.

Wednesday, October 12, 2011

ADF Survey

Today, Grant Roland published a post regarding a goal to improve ADF. There is a survey for ADF that will help Oracle improve, even more, the ADF future.

Let us all express our opinion and provide feedback for the best possible improvement of ADF.

http://blogs.oracle.com/grantronald/entry/your_chance_to_change_the

https://www.oraclesurveys.com/se.ashx?s=705E3EFC4861B8FE

Regards,
Dimitris.

Tuesday, October 11, 2011

Create Row in a Table after leaving an input Field (ValueChangeListener usage) ADF 11g

Hi,
This is a sample application demonstrating the following case:
We have an af:table with rows from a View Object. What we want is to create a new row right after leaving an input Field.
What we are going to do is to make use of the valueChangeListener.
First we are going to do is to create a simple page.
For this example, the HR schema is used and more specifically the Regions Table.

Download the Sample Application.

After creating the appropriate Business components (entities and view objects), we will create a jspx with its pageDefinition. In the jspx we drag and drop the Regions View Object as a table.
In the page Definition, we add the operation binding of CreateInsert.


After that, we select the input field we want to use for the creation of the new row and we create a valueChangeListener. If no Backing Bean is present the wizard will help us create one on the fly and very easily. Additionally, we have to set this field to autoSubmit=true;
Furthermore, we have to create a binding of the Regions table because we need it in order to refresh the table right after the creation of the row. The refresh is needed because we want to show to the user (actually refresh the UI)  that the row is already created and correctly shown.


The last this left is to write some code in order to actually create the new row right after leaving the input field (via pressing tab lets say)

The code to write in the ValueChangeListener is fairly small and rather easy. All we have to do is call the CreateInsert operationBinding and then refresh our table.


And that is it.
When you run the application you will see that after changing a value and pressing tab a new row will appear on the table. Note that this row is not posted in the DB and does not exist there. This sample application has no other operations like commit or rollback included.

Download the sample Application.

Regards.


ADFUtils.java And JSFUtils.java

Hi this is some kind of personal finder.. I uploaded an Application containing the ADFUtils.java and JSFUtils.java classes create by three ADF Ninjas:
@author Duncan Mills
@author Steve Muench
@author Ric Smith

I know, at this point I have to say that this is not my code. I did not wrote it. I simply put it up in my blog because I seem to loose track from time to time and I need it somewhere that I can easily find and download. Of course, the code is in the Demo as mentioned here

https://forums.oracle.com/forums/thread.jspa?threadID=1105943

But again, I find it more practical to additionally have it on my own list without claiming any credit for this code.


http://adfsampleslist.googlecode.com/files/ADFJSFUtilsApplication.zip

Regards,
Dimitris.

Sunday, October 9, 2011

Rollback After Validation Error Entity Level. ADF 11g

Hi,
There has been a discussion in the OTN forum regarding how to rollback when an Entity validation error appears..
Well, at first, I thought we could use the refresh(int refMode) method inside a validation method which will reside in EntityImpl java class. This thing is that this approach does not seem to work properly... at least for me.. Or maybe, according to documentation, I cannot place the correct combination of refresh MOdes.. If anyone has a successful example, please

http://download.oracle.com/docs/cd/E12839_01/apirefs.1111/e10653/oracle/jbo/Row.html#refresh%28int%29

The case is rather simple.
We have a validation rule for an attribute. If this validation fails, we have to rollback.
Well, of course the validation rule will be applied in the BC and more specifically in the entity. Since we want to have an additional logic after the validation, we will create a validation method through the wizard.
So, after our validation method, we will rollback, calling the DBTransaction rollback;

this.getDBTransaction().rollback();

This example will always rollback. It is just an example.


After setting up successfully the validation method to the DepartmentName attribute in the EntityImpl java class, all we have to do is to drag and drop the Departments Iterator in our jspx as a af:table. Last thing is to have the DepartmentName autosubmit=true.
And that's it, it will refresh the value from the db.

Download the Sample application:
http://adfsampleslist.googlecode.com/files/ValidationRefreshExample.zip

Regards,
Dimitris.


LinkWithin

Related Posts Plugin for WordPress, Blogger...